Dieffenbachia Care Guide: How to Grow and Maintain Thriving
Introduction
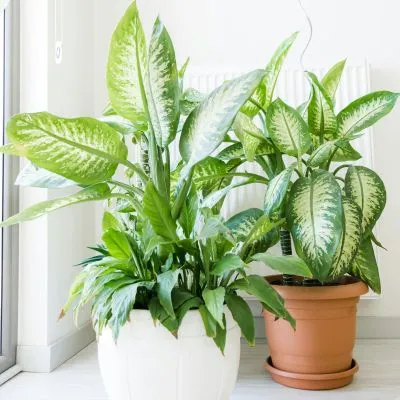
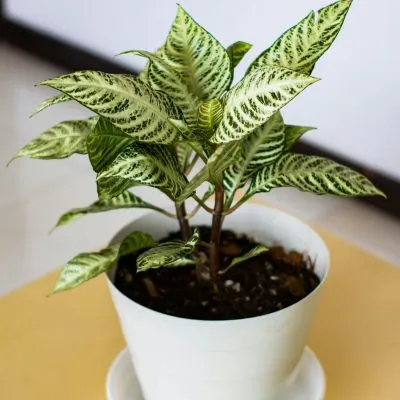
If you love indoor gardens, you might have come across Dieffenbachia, commonly known as Dumb Cane. This stunning tropical plant is popular for its stunning variegated foliage, which makes it an excellent option for any interior area. If you’re brand new to the art of caring for plants or are looking to grow the size of your garden indoors, this plant is a great option that requires little maintenance and has vibrant, lush foliage. In this thorough guide, we’ll walk you through all you need to know how to maintain and grow an enviable plant.
Dieffenbachia Plant Overview
Before we get into the specifics of Dieffenbachia treatment, let’s begin by introducing some fundamental details about this amazing plant.
Quick Facts Table
| Common Name | Dumb Cane |
| Botanical Name | Dieffenbachia spp. |
| Family | Araceae |
| Plant Type | Evergreen perennial |
| Mature Size | Its length is between 3 and 4 feet, and its width is between 3 and 4 feet. |
| Sun Exposure | Bright indirect light |
| Soil-type mix | made of peat that is well-drained and drains easily. |
| Soil pH | A little acidic (6.1-6.5) |
| Hardiness Zones | 10-12 (USDA) |
| Native Area | Central and South America |
| Toxicity | Toxic to humans and pets |
Essential Dieffenbachia Care Tips

Light Requirements
A major and crucial aspect of Dieffenbachia maintenance is to provide adequate light. The plant thrives in the indirect, bright sunlight that helps to maintain its gorgeous, intricately patterned leaves. Direct sunlight can damage its delicate foliage, creating unattractive scorch marks. If you put your plant in a location that receives a lot of sun, You may see the leaves turning brown or yellow, which indicates that it’s unhappy.
Tips: An east-facing window is ideal for Dieffenbachia as it offers plenty of indirect sunlight in the morning without subjecting the plant to extreme midday sunlight.
Although Dieffenbachia tolerates low-light circumstances, the plant can take longer to grow and might not produce as lush leaves. You should provide moderate light levels if you’re looking for a more lush, healthier plant.
Best Soil for Dieffenbachia
Selecting the right soil is essential for Dieffenbachia’s overall well-being. It is a fan of a well-draining peat-based mix that holds some moisture but isn’t damp. A soil that is too wet could cause root decay, which is a typical issue with indoor plants. If you aren’t sure about the drainage capacity of your soil, adding perlite or sand will improve the drainage.
Dieffenbachia is soil that has a pH slightly acidic and is typically somewhere between 6.1 and 6.5. This pH range ensures that the plant can absorb vital nutrients effectively, which is essential for healthy development.
Tips: If you make your potting mix, blend equal parts of peat-moss perlite and pine bark to create an easily draining mix that retains water without becoming too compacted.
Watering Guidelines
It is essential to water your plant correctly is vital to the care of it. It enjoys having its soil consistently moist but not completely damp. A lot of water can result in root rot; however, too little could cause leaves to begin to brown near the edges. The best general rule of thumb is to wait until the soil’s top layer feels dry before you water.
In the winter months, Dieffenbachia goes into a phase of dormancy. Consequently, its water needs are reduced. Limit the amount of time spent watering in this period to let the plant lay down. Be sure that excess water is removed from the pot. Do not leave water in the saucer under the plant.
Tip: Use room-temperature water for your Dieffenbachia. Cold water could shock the plant’s roots, and hot water may harm fragile leaves.
Temperature and Humidity
Dieffenbachia is an endemic plant, which means that it flourishes under humid and hot conditions. The ideal temperatures are 65 degF to 75degF (18degC up to 24degC). Do not place it in areas that have cold drafts, for example, close to window vents or the air conditioning unit, because rapid temperature fluctuations can result in stress on the plant.
The importance of high humidity is to the health of Dieffenbachia. The plant can have brown leaf tips and edges in humid indoor environments. To aid in reducing humidity, it is recommended to place your Dieffenbachia on a tray of humidity and a humidifier or misting leaves on a regular basis.
Tips: Grouping your plants together will help create a microclimate that has greater humidity levels, which will benefit all of your tropical plants.
Fertilizer Needs
Dieffenbachia is a low-maintenance plant in relation to fertilization. It is, however, during the growth period (spring and the summer); feeding it every 4 to 6 weeks will encourage healthy growth. Make use of a water-soluble balanced fertilizer to supply vital nutrients. Make sure to reduce the fertilizer’s strength to avoid feeding too much, which can result in root burn.
In winter, when growth slows, you can cut back or stop fertilizing completely. At this time, fertilizing too much can cause imbalances in nutrients.
Pruning and Maintenance
Pruning regularly is crucial to ensure the appearance and health that you have of your Dieffenbachia plant. Pruning can help remove damaged or yellowed leaves and encourage growth. Make sure you use sharp, clean cutting tools or shears for cutting off leggy stems and do not be afraid to trim down some bigger leaves to form the plant.
Tips: Always prune just above the leaf node (where the leaf stem joins its primary stem) to create new shoots and to keep the plant in a bush.
Propagating Dieffenbachia
Propagate by Division
Dieffenbachia can be propagated through division by separating an offshoot of the main plant and placing it in its own pot. This is the most straightforward method of repotting because you can cut the plant’s root ball into smaller pieces, ensuring that every division has a root and an appropriate growth point. New shoots will grow from these divisions, providing you with a fresh Dieffenbachia plant.
Tips: Always use a clean, sharp cutting or slicing tool when splitting to stop the spread of disease.
Propagate from Offshoots
Another method to propagate is by using offshoots. They are tiny, new sprouts that grow at the bottom of the plants or on the stems. Remove the offshoot gently and ensure it has a small root system before replanting. Put the offshoot in an untidy pot with well-drained soil, and then keep the plant in a warm and humid place until it can establish its roots.
Potting and Repotting
Dieffenbachia does not require regular pots. However, as it develops, it could eventually outgrow its pot. Plant it in a new pot every 2 to 3 years or when you observe that the roots are starting to exceed the size of the pot. Pick a new pot about 1-2 inches bigger than the size than the one you have to allow the roots space to grow. Ensure the new device has holes to prevent water from accumulating at the bottom.
Tips: Spring is the ideal time to plant your Dieffenbachia since it encourages strong growth in the warmer months.
Overwintering Dieffenbachia
In the winter months, Dieffenbachia enters a dormant period. To allow it to thrive throughout the winter months, relocate it from cold breezes and keep the temperature steady. If your home is extremely dry during winter months, you can use humidifiers or mist the plant to prevent dry leaves.
Dieffenbachia Blooms

How to Get Dieffenbachia to Bloom
Dieffenbachia is a flowering plant that can blossom under appropriate conditions but is not the most prolific flowerer. To encourage blooms, ensure the best lighting, humidity, and an environment rich in nutrients. Although blooms aren’t common and rarely appear until the latter part of spring or early summer.
Bloom Months
Dieffenbachia usually blooms from later spring and the beginning of summer. The flowers aren’t particularly beautiful, but they could provide your plant an additional dimension of beauty once they appear.
How to Encourage More Blooms
To make sure that your Dieffenbachia flower is more often, ensure that it is receiving adequate light and water and be careful not to over-fertilize. You can also trim the plant once it has bloomed to stimulate the development of healthy, new stems.
Deadheading Dieffenbachia Flowers
After the flowers have faded when they begin to fade, it’s recommended to remove the flowers by cutting off the flowers that have died. This lets the plant concentrate its efforts on growing strong roots and leaves instead of maintaining older flowers.
Troubleshooting Common Dieffenbachia Problems
Leaves Turning Yellow
The yellowing of leaves on Dieffenbachia may be the result of flooding, overwatering or not enough sunlight. Verify the moisture levels in the soil and ensure that the plant gets enough sunlight.
Plant’s Leaves Falling Off
If the leaves of your Dieffenbachia are beginning to fall off, they could be an indication of lower humidity or exposure to drafts. Consider moving it to a location that is more stable and increasing the moisture.
Leaves Turning Brown
The brown tips of the leaves are usually an indication of the plant being submerged or in low humidity. Make sure you water your plants regularly and think about misting your plants to increase the humidity surrounding them.
FAQ: Dieffenbachia Care
Q: How much light does Dieffenbachia need?
A: Dieffenbachia thrives in bright, indirect light. It can tolerate light that is low, but its growth rate is slow.
Q What is Dieffenbachia harmful for pets?
Absolutely, Dieffenbachia can be harmful to humans and pets if consumed. Make sure it is out of the reach of animals and children.
Conclusion
Care for Dieffenbachia is rewarding and easy once you know the basic requirements. If you take care of it properly – light, soil and humidity, you can have a vibrant, beautiful, vibrant plant in your own home. If you’re trying to propagate, spruce up, or simply admire the gorgeous leaves, Dieffenbachia is sure to make a splash in your indoor gardens. Happy gardening!


